|
|
|
No.12. Browning X-Bolt Install a Light Trigger Spring
| Picture #1 | 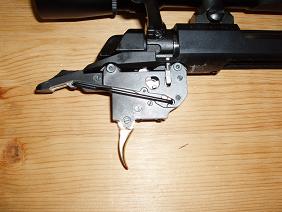 |
The first step necessary to replace the X-Bolt trigger spring is to remove the trigger assembly from
the receiver. Do this by driving out the 2 pins seen at the top of the trigger housing. These pins have serrations
on the ends that we see in this picture. Therefore, they must be driven out from the other side, as shown by
the punch in the next picture.
| Picture
#2 | 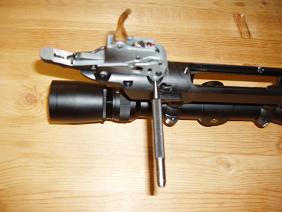 |
The punch is shown driving out the front trigger housing retaining pin. Drive both the front and
the rear pin out from this side.
| Picture #3 | 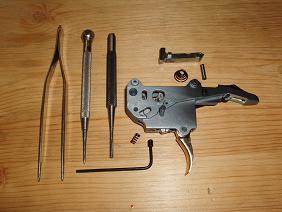 |
Picture #3 shows the X-Bolt trigger assembly sufficiently disassembled to replace the trigger weight of pull spring.
Also shown are the tools necessary to do this.
After removing the trigger assembly from the receiver, remove
the sear and the cone shaped sear spring, by driving out the sear pivot pin. This pin is just in front of the safety
button.
Near the center of the trigger housing, you will see the actuator pivot pin. Drive this pin
out just far enough to release the actuator, but not all the way out of the trigger housing. Now It will
be necessary to move the actuator slightly to the rear and down, so that better access to the trigger spring can be had.
After making this move, a small part of the actuator can be seen protruding from the bottom of the trigger housing, just
in front of the trigger.
The new spring is shown on an angle at the lower front corner of the trigger housing.
It is pointing at the hole in the housing through which it must be inserted. I use a combination of the pictured tools
to work the spring into place. The lower end of the spring must fit down into the housings spring pocket, which is located
directly above the allen head weight of pull adjusting screw.
Complete the installation of the spring by
moving the actuator back into its original position, above the upper end of the newly installed trigger spring, and with its
pivot hole aligned with the pivot pin. Tap the pivot pin back into place, and install the weight of pull adjusting screw. Verify
that the actuator is now powered by the trigger spring and moves smoothly.
| Picture #4 |  |
Trigger assembly being installed on receiver, Tap trigger assembly retaining pins in from this side,
with serrated end of pin up. With rifle assembled, but un-loaded, check for reliable function of the trigger, the
safety, and the bolt lock.
No liability is expressed or implied for damage or injury which may result from the improper installation
or use of this product.
(For information
only do not add to cart)
Item #2012
|

|