|
|
|
N0. 8. Winchester M-70 M.O.A. Install a Light Trigger Spring .
Lighten and smooth the NEW M-70 M.O.A. Trigger introduced
by Winchester in 2008.
| Picture
#1 | 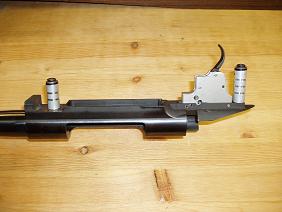 |
A new 2008 M-70 barrel and receiver with M.O.A. trigger assembly.
This receiver also has a "Bed Heads" Aluminum Pillar Bedding Kit attached.
| Picture #2 | 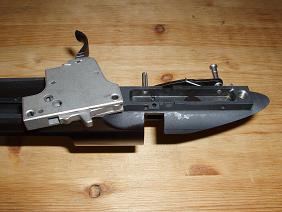 |
Just tap out the two retaining pins like this, and the trigger assembly drops
right out. No springs fly, and no parts fall out. The trigger assembly remains a self contained unit, just as
you see it here.
| Picture #3 | 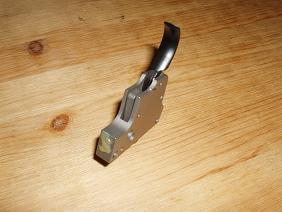 |
New M-70 M.O.A. trigger showing epoxy applied by Winchester to seal access to weight of pull, and over-travel adjusting screws
| Picture #4 | 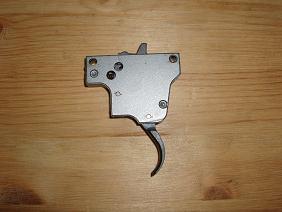 |
M.O.A. trigger,
left side view.
| Picture
#5 | 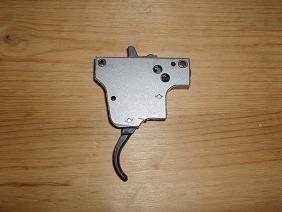 |
M.O.A. trigger, Right side view.
| Picture #6 |  |
A closer
view of the trigger attachment area in the new (2008) M-70 receiver.
Once again, when removing the trigger,
just tap the two pins out to the point shown in this picture. When it is time to re-assemble, place the trigger unit
in the receiver, line up the holes, and tap the pins back through the trigger assembly. (You may be able to push the
rear pin back through the trigger housing, with finger pressure alone.)
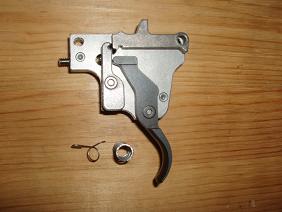
| Picture #7 | 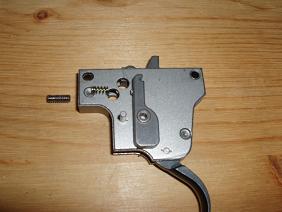 |
M.O.A.
trigger assembly with weight of pull adjusting screw, and the weight of pull spring. Then, the actuator pivot pin, which
has been driven far enough out of the trigger housing to allow removal of the actuator. And then the "actuator"
itself.
When assembled, the weight of pull spring is located by the small "peg" seen near the top
of the actuator.
| Picture #8 | 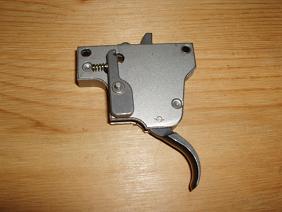 |
The actuator has been placed
over its pivot pin, and the spring has been placed over its locating "peg"
This picture is just
to show the proper relationship of these parts when assembled in the trigger housing.
| Picture #9 | 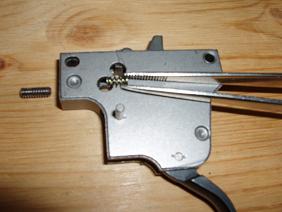 |
Begin
re-assembly by installing the new spring through this hole. Place actuator in the housing from the bottom, and slide
upward toward the spring. Use a small screw driver to reach in through the hole and compress the spring enough to allow
passage of the actuator and its spring locating "peg". Release pressure on the spring while guiding it over
the "peg'. Then drive the pin in place. Re-install weight of pull adjusting screw. Now the trigger
assembly is ready to re-install on the receiver. Simple is good!
This spring should allow a
weight of pull from about 2½ to 3 lbs
To purchase this spring click on link: Trigger
Springs for Rifles
No liability is expressed or implied for damage
or injury which may result from the improper installation or use of this product.
Item #2008
|
|